Getting started with GitHub
To start working with GitHub, you first need to set up your GitHub account. With GitHub Desktop, you can easily manage your repositories on your computer.
Setting up a GitHub account#
To set up a new GitHub account, follow these steps:
- Go to the GitHub website.
- In the upper right-hand corner, click Sign up.

- Enter your Username, Email address, and Password.
- Under Verify your account, solve a puzzle to confirm you are not a robot.
- Click Create account.
- Check your inbox. In an email from GitHub, click Verify email address to complete your registration.
Installing GitHub Desktop#
To install GitHub Desktop on your computer, do the following:
- Go to the Github Desktop download page.
- Download an installation file appropriate for your operating system.
- Once downloaded, execute the file and follow the instructions displayed in the setup assistant.
Creating a repository#
To create a new repository, follow these steps:
- Open a browser and go to your GitHub account.
- Click Repositories > New.

- Enter the Repository name and, optionally, a Description.
- Choose whether you want your repository to be Public or Private.

- Click Create repository.
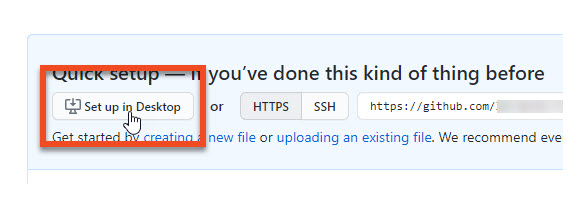
- To manage your repository from GitHub Desktop, click Set up in Desktop.
- In GitHub Desktop, enter Local path and click Clone.
Working with your repository in GitHub Desktop#
To update your online repository once you have edited it locally, follow these steps:
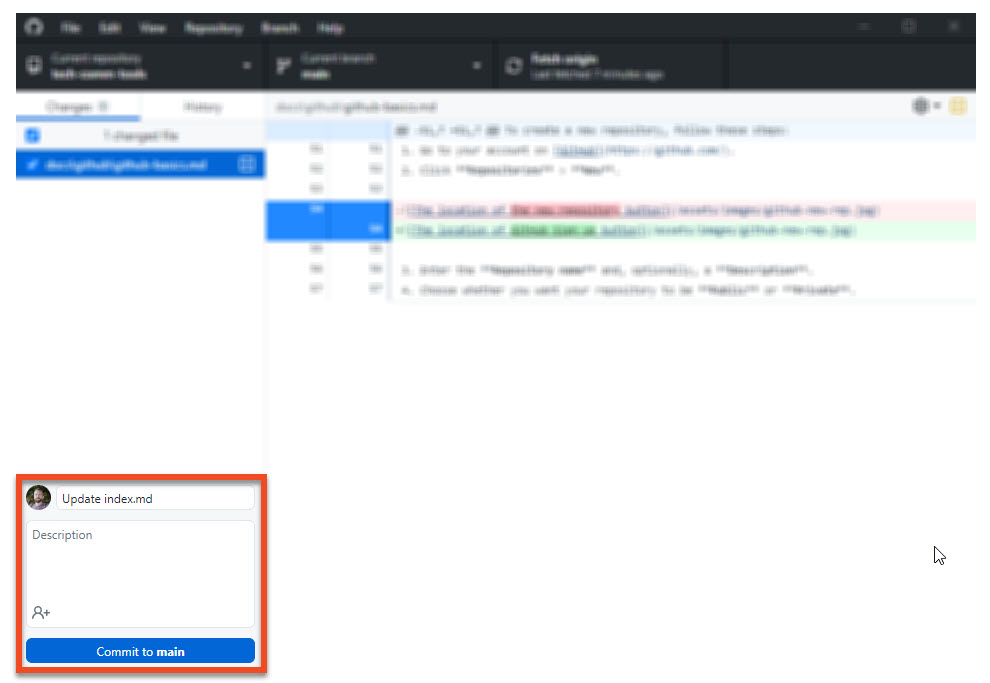
- In GitHub Desktop, enter the name for your changes and an optional description.
- Click Commit to branchname, where branchname is the name of the current branch, for instance main.
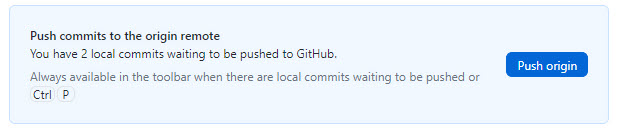
- Click Push origin.